Preheat the oven to 200C/Gas6 and lightly butter 3 large baking sheets
Put the butter in a saucepan with 450ml water and gently heat until the butter has melted; bring to the boil, then immediately tip in the flour, all in one go; beat with a wooden spoon until the mixture forms a ball that comes away from the sides of the pan; leave to cool for 5 minutes
Add the beaten egg, a little at a time, beating well between each addition, until the mixture is glossy and just holding its shape; you may not need all the egg; spoon the mixture into a piping bag fitted with a 2.5cm plain nozzle
Pipe small rounds about 4cm in diameter, on the baking sheets, trimming the paste from the bag with a knife; leave room between them to allow for spreading; you should end up with about 70 balls; bake for 25 minutes, until well risen and golden; as soon as the pastry is cooked, make a 1cm slit on the side of each bun to let the steam escape; transfer to a wire rack to cool
Beat the cream and fold into the cream cheese together with the icing sugar until smooth; fill the buns with the cream cheese mixture
To make the butter icing, beat together the butter and icing sugar until creamy; stir in the pine nuts
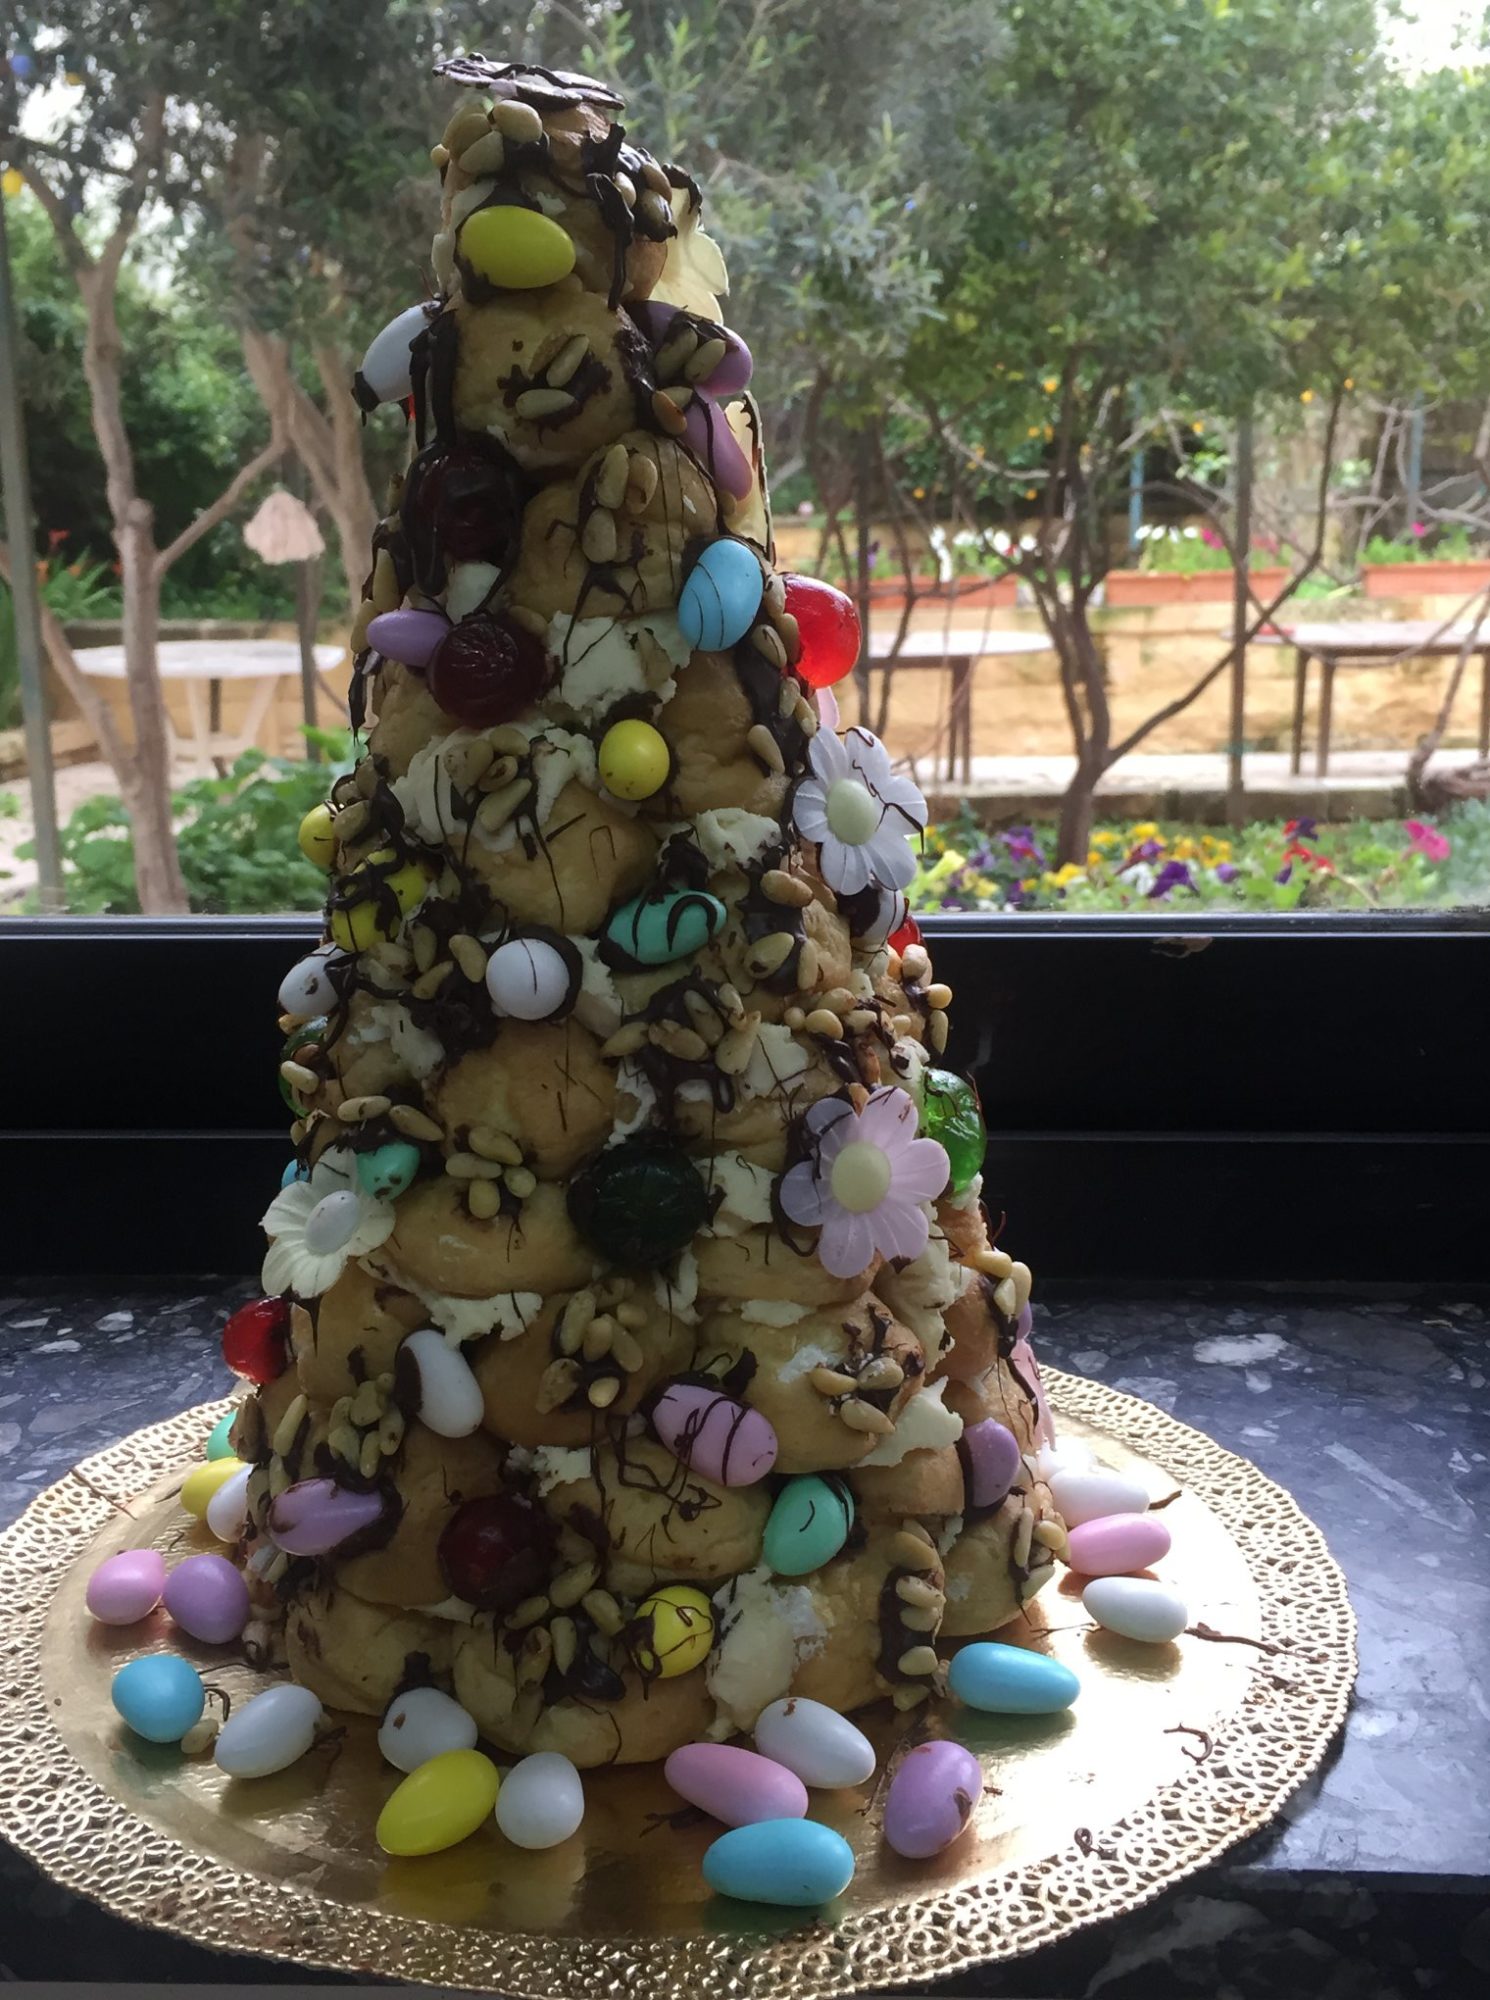
Rest the cone in a large mug for support; put a small bun into the point of the cone with the bun’s base face up; spoon some butter icing onto the base and secure 2 small buns over the first, again with the base up; spoon over some more butter icing and continue like this and work up the cone, working in horizontal layers until the cone is filled and making sure that each bun is firmly secured with the icing before proceeding to the next layer; make sure that the final layer forms a flat base; keep the cone in a cool place overnight to harden
Carefully invert the cone onto a flat serving plate, then lift away the cone; gently peel the foil
Carefully dip the base of the decorations in the melted chocolate and secure all over the choux cone
1 x A1 sheet of card
Length of string 60cm long
Piece of foil
Make a pencil mark halfway up a long edge of the A1 sheet of card
Mark the halfway position on both short edges and draw a line from each point to the mark on the long edge
Attach one end of the string to a pencil and holding the other end at the point on the long edge, draw a curve from the point on the opposite side
Cut out the shape to use as a template to create the same shape in foil; tape the foil over the card and roll up, foil inside, overlapping the straight edges to make a cone shape with a 20cm diameter opening
Secure with tape and snip 10cm off the point of the cone
20 servings